Guestbook
| The
frameover, part 2 |
Guestbook |
|
(this is a continuation of part 1)
So, I gave up on galvanizing because of the logistical difficulties among other things. Now the frame swap can proceed.
January 20: I've been coating a few of the smaller parts with POR-15 to learn more about it. I think I'm going to have to spray it inside the frame to get good protection.
January 23: The frame is prepped (that was a noxious night in the garage!) and ready to go. Spraying isn't going to work for the frame interior. Hmm. All the electrical parts have arrived as well.
January 27: I spent the weekend painting. The frame and bulkhead are looking good. Very black. POR is very cool stuff when it's dry.
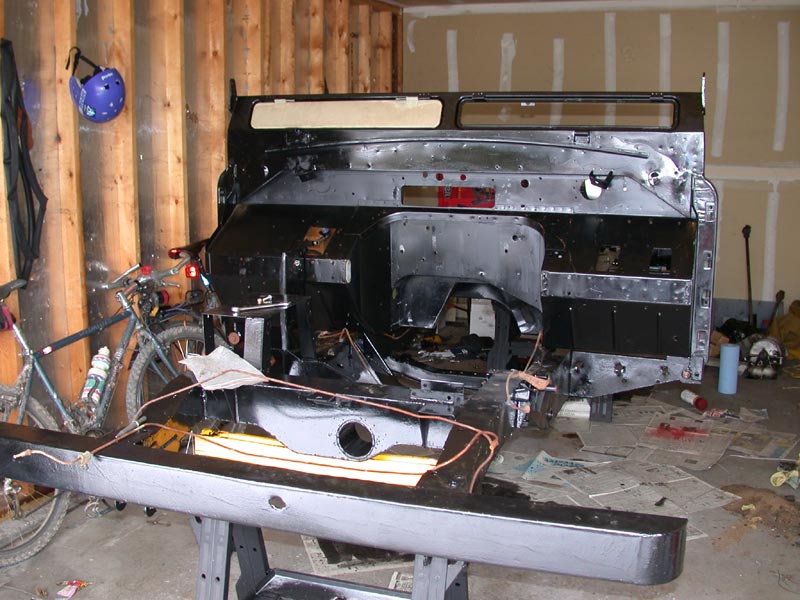
January 29: The big parts are painted. I still have a few brackets, etc to do but that's nothing. Right now, the bulkhead is mounted on the frame and everything looks very shiny and new. I spent the evening tinkering - playing with the brake lines, attaching the handles on the rear, thinking of how to paint the bulkhead in terms of colours. All very enjoyable. The fact that I have a set of factory brake lines is a blessing, because now I don't have to guess at how they should be routed.
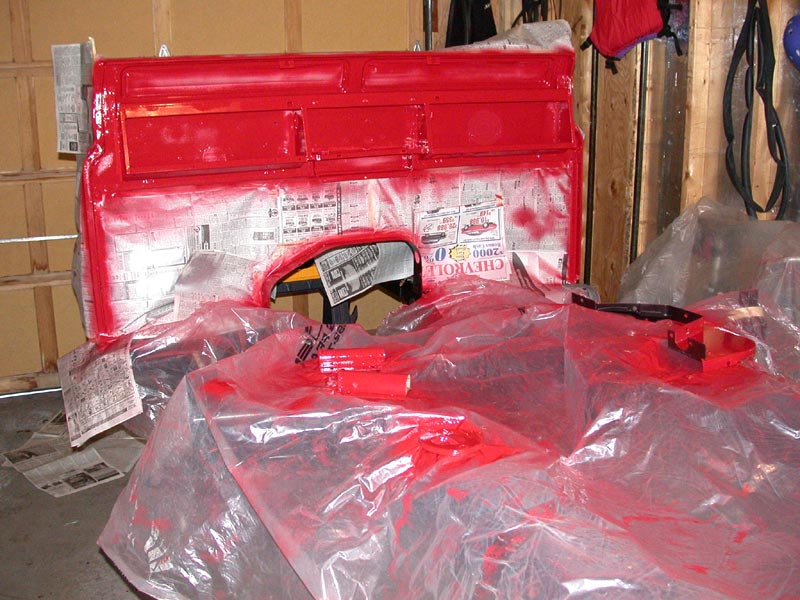
February 3: The colour coat is now on the bulkhead. This was fun, because I'm painting different colours inside and out in an attempt to match the original fading. The layout for the wiring has begun and I have sourced a few parts to make the changeover easier, such as a spare steering system and an extra instrument panel to verify clearances. I'll rebuild that steering box and put new balljoints on the rods while I've got it sitting around. My friend Don Piburn is proving to be very helpful, even offering to do some aircraft-quality crimping on a couple of essential cables.
February 6: A start to building the harness - but that's overshadowed by the fact that Basil was featured in Land Rover World magazine. Am I excited? Ooooo yes.
February 7: Did I mention Land Rover World magazine? Oh yes, I did. Well, tonight was more wiring. I seem to be making a lot of additions and changes to my wiring diagram. It's still not far off, though. A suggestion? Check out Jean-Leon's website. He's the kind of guy who not only thinks outside the box, he'll go ahead and DO it.
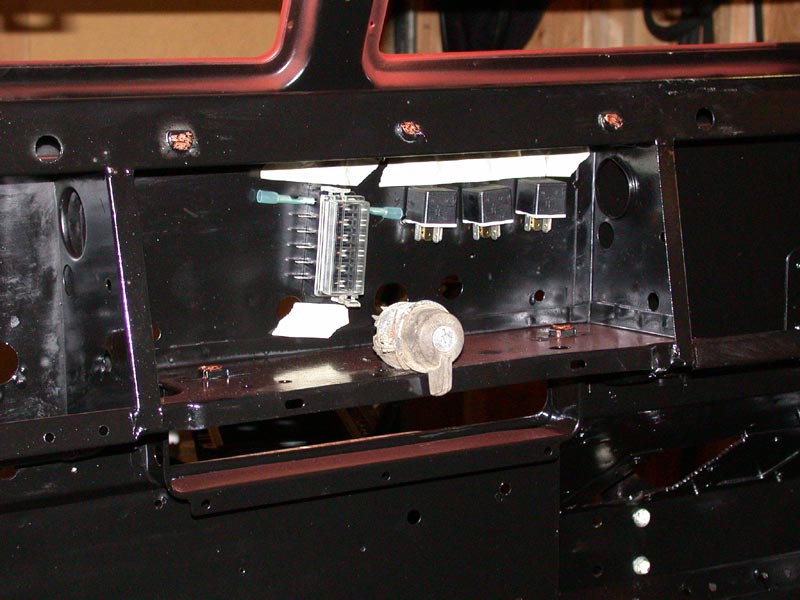
February 10: It's been a wiring week! Some serious progress is being made, including a finished fusebox and an almost-finished dash. I also pulled a couple of instruments and the heater to install on the new bulkhead. Wow, I just might finish this! Someday.... The new guestbook is proving quite popular!
February 11: The new steering column is in place and awaiting the rebuild of the steering relay. I also hooked up a battery, the master switch and the main breaker to the electrical system for the first test. The dash lights and relay for the cooling fan work - and that's as far as I got :) But it sure did feel good.
February 14: All the lighting has been tested with the exception of the turn indicators. So far, so good. The instruments are in place. I've also sent a tentative date for the Big Swap: a week and a half from now. A surprise visit from my friend Trevor is providing the impetus. That's going to mean a busy weekend and some late nights, but it's an attainable goal. The hardest parts are done. Next step is to drive Basil to the shop so I can do some parts stripping there at night and render him undriveable. Not that he has much of a wiring harness left....
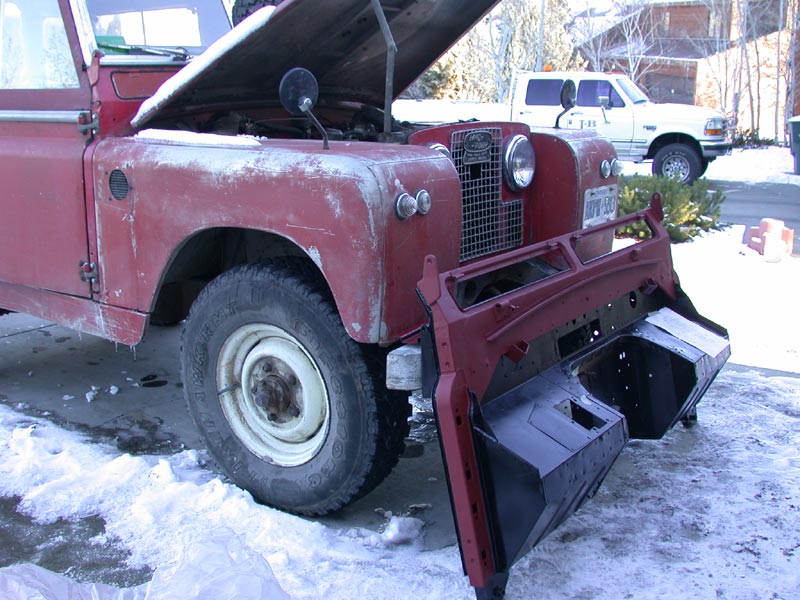
February 17: It's been a busy weekend. The high point was Basil's last trip to the shop with a kludged wiring system. To turn on the ignition, turn the headlights on. Worked beautifully - and a good thing as well, as I didn't have a key for that extra switch. While removing the front wings, I discovered that a splash shield of sorts had been rivited into place some years ago instead of the factory one. This was connected to the wing and the bulkhead, meaning the only way to get it off was to cut! More worrying than this, however, was the discovery that one of the front brake lines had a pinhole leak from rubbing on a steering arm at lock. This would have led to an exciting failure.
February 18: Getting closer. The freshly painted seatbox is being assembled, the fusebox is now securely anchored and a number of little things are done. Doesn't sound like much, but they all things that would need to be done on the weekend. Basil shall be immobilized on the lift either tomorrow or Wednesday, and at that point the hydraulics and steering come out. I'm not going to get much rest.
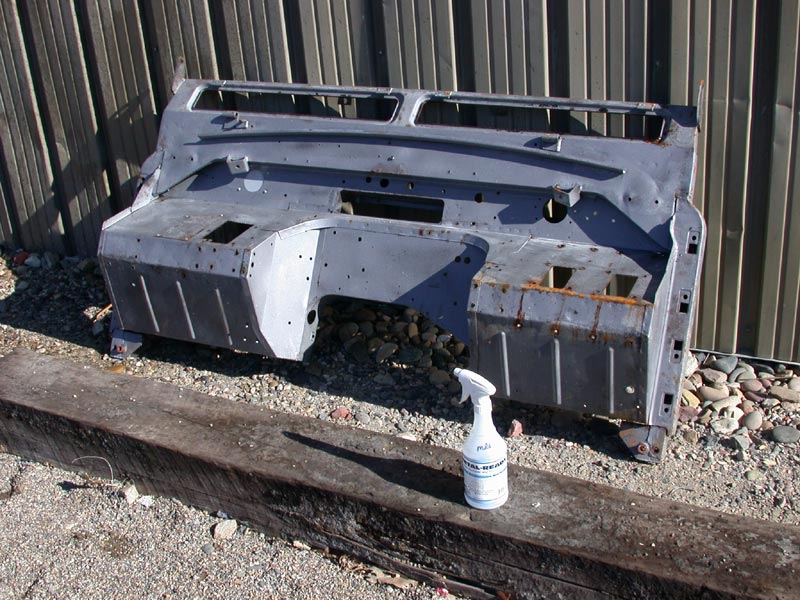 |
The new bulkhead before treatment with the POR prep. |
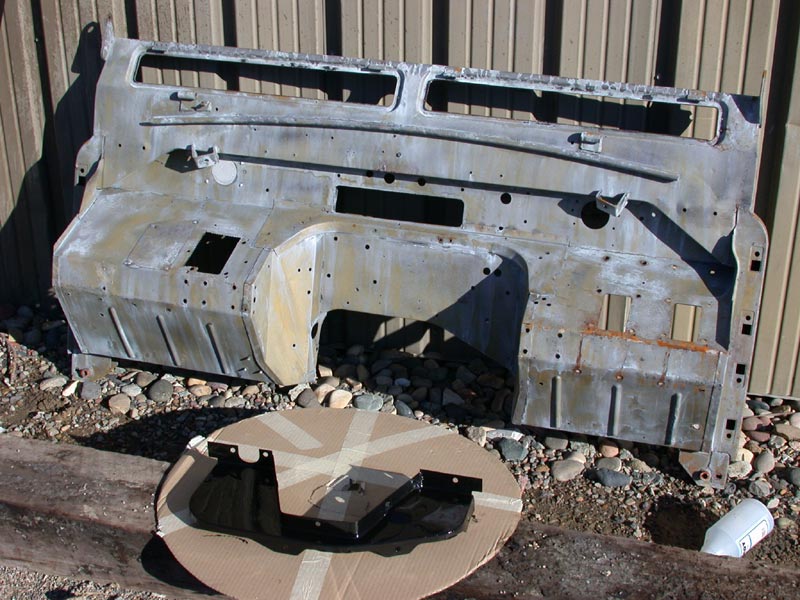 |
It's not exactly pretty afterwards, but the piece in front has one coat of POR. Makes a big difference! POR likes crusty metal, not shiny. |
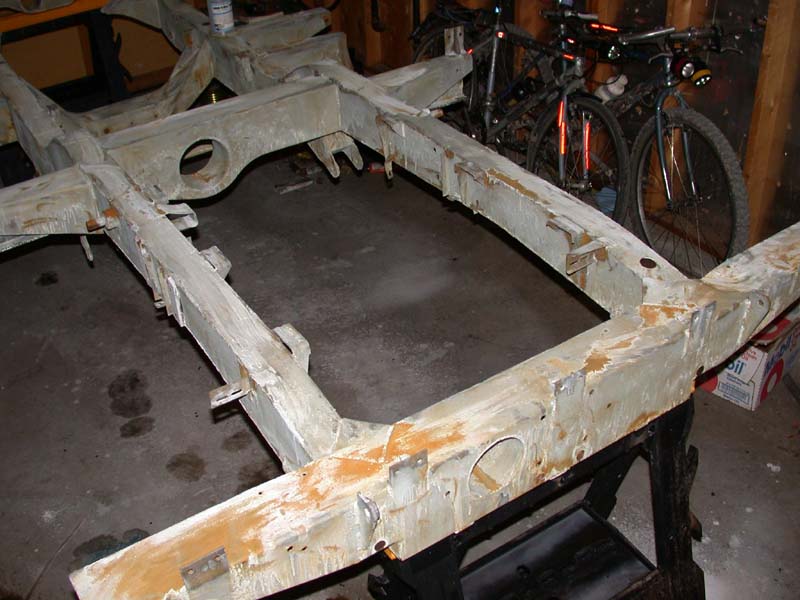 |
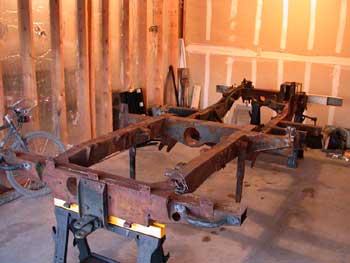
Eww! The frame is prepped and ready for POR. It's going to look a whole lot better when that's done. |
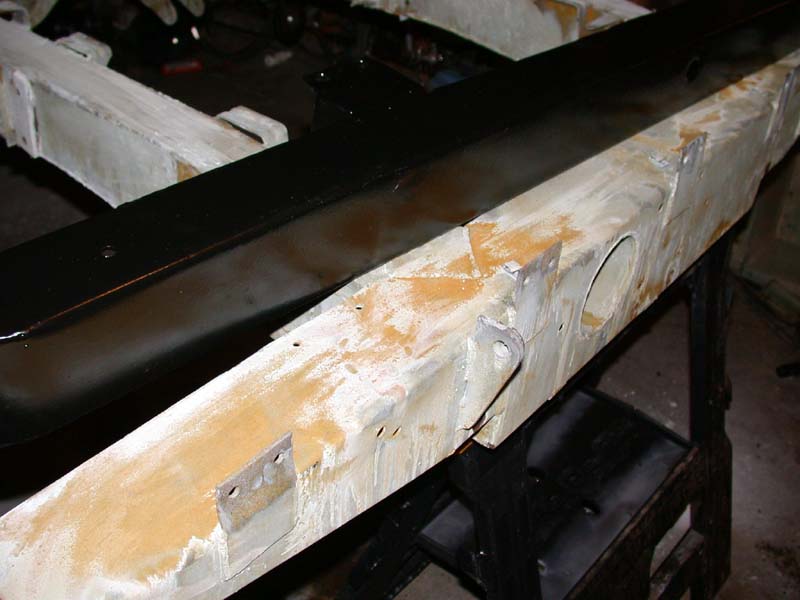 |
Hard to see, but there's the POR'd front bumper with the prepped crossmember. Smooth, tough and black! |
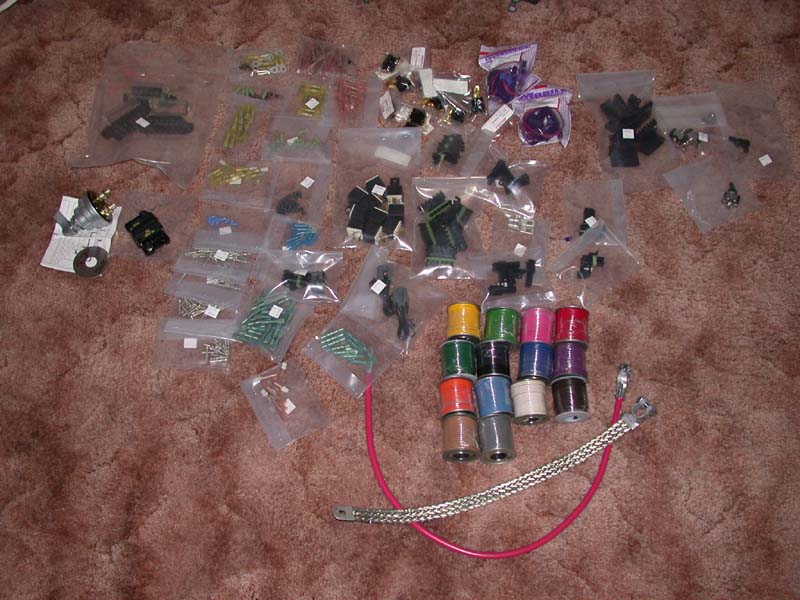 |
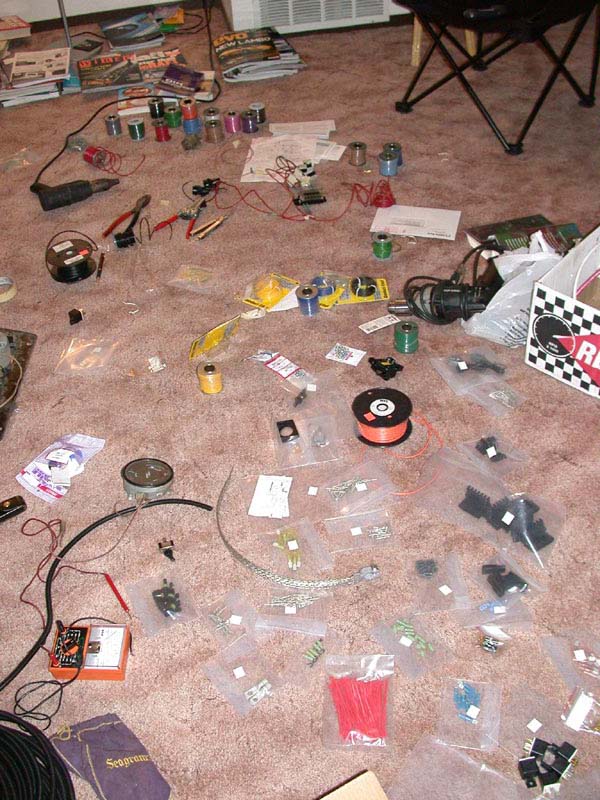
Pretty much everything for the electrical work is here now... |
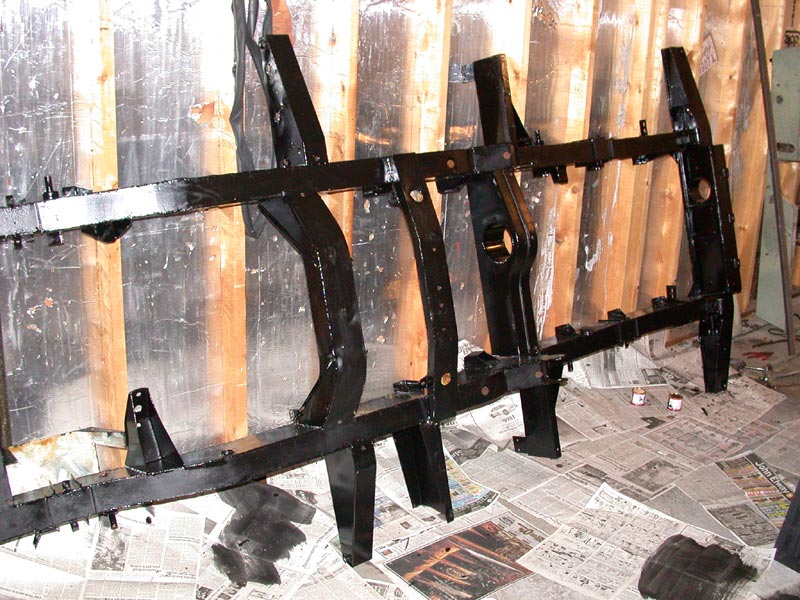 |
The POR is finally on the frame. I think the strength of the POR alone is about the same as the old frame. |
 |
The bulkhead is about half done with POR. Looking good. |
 |
The frame and bulkhead fully protected. |
 |
Painting the bulkhead. |
 |
Not a bad match to the original paint, no? This is the same paint used on the doortops and bonnet. |
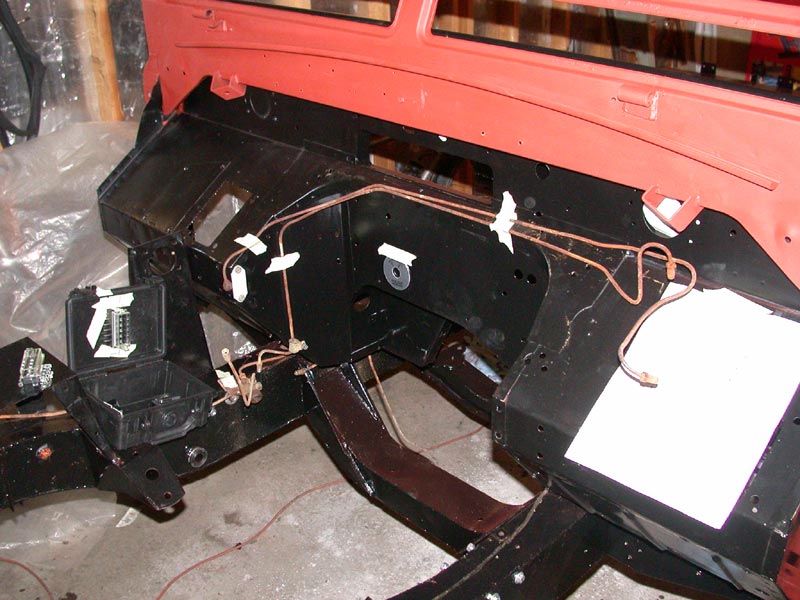 |
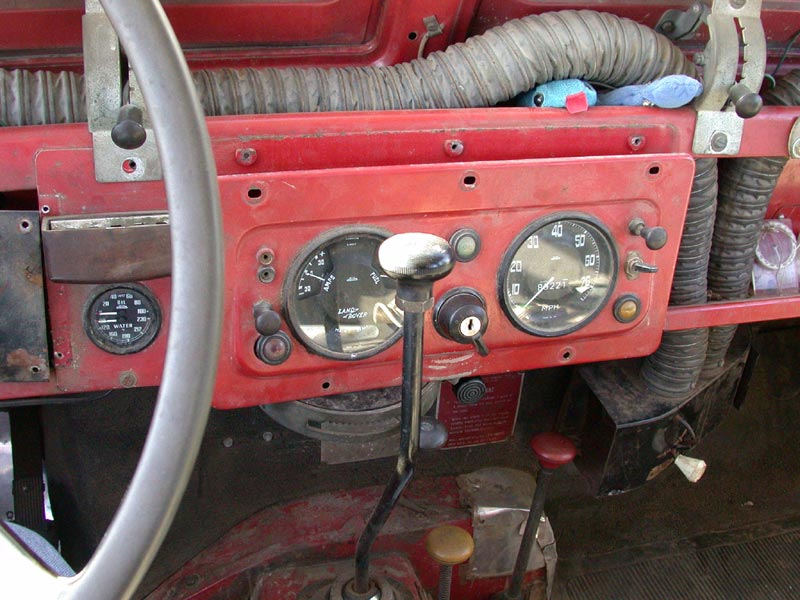
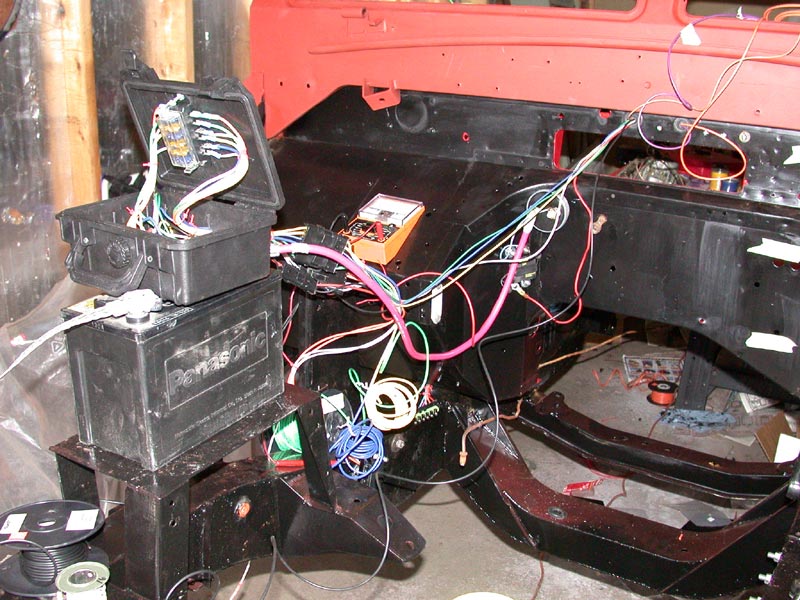
Checking the layout of the brake lines and various electrical components. The fusebox will be in that Pelican case, sitting where the original air cleaner lived. You can see the master switch location on the firewall. |
 |
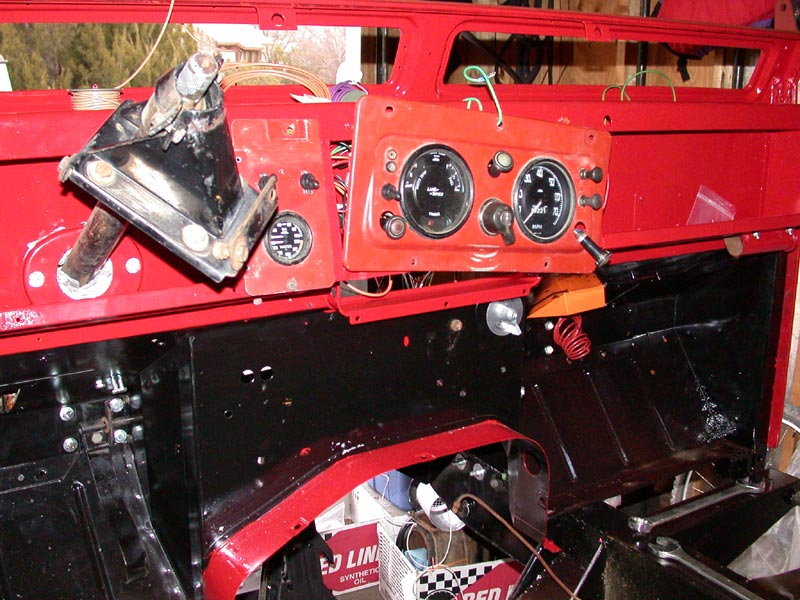
Checking the layout behind the dash panel (before painting). |
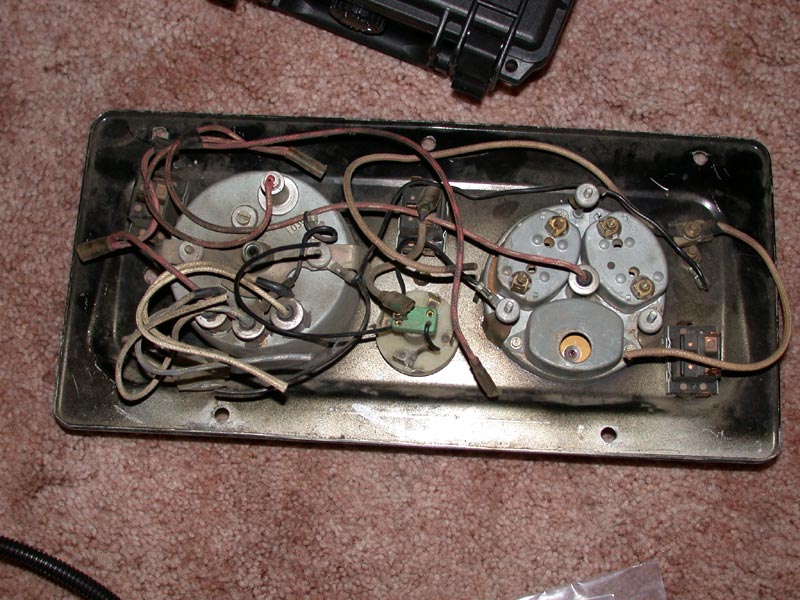 |
This is what has to share space with the above bits. |
 |
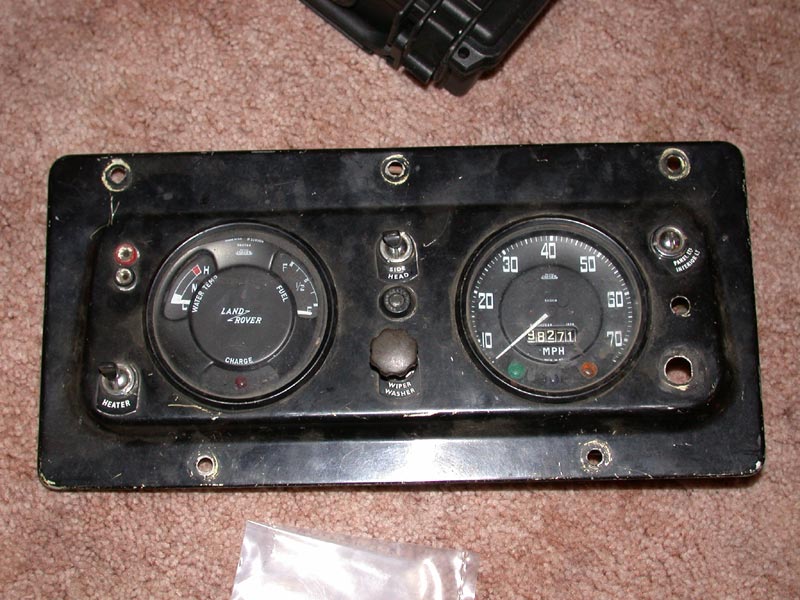
Basil's dash panel now. Some of these switches will be replaced, and the giant ashtray will be removed. |
 |
An interesting comparison with a later IIA, built very shortly after Basil but with negative earth. Note the water temp gauge in the left group, the three warning lights in the speedo and a complete change of layout for other switches. The ignition switch is gone from the dash. |
 |
The wiring begins. |
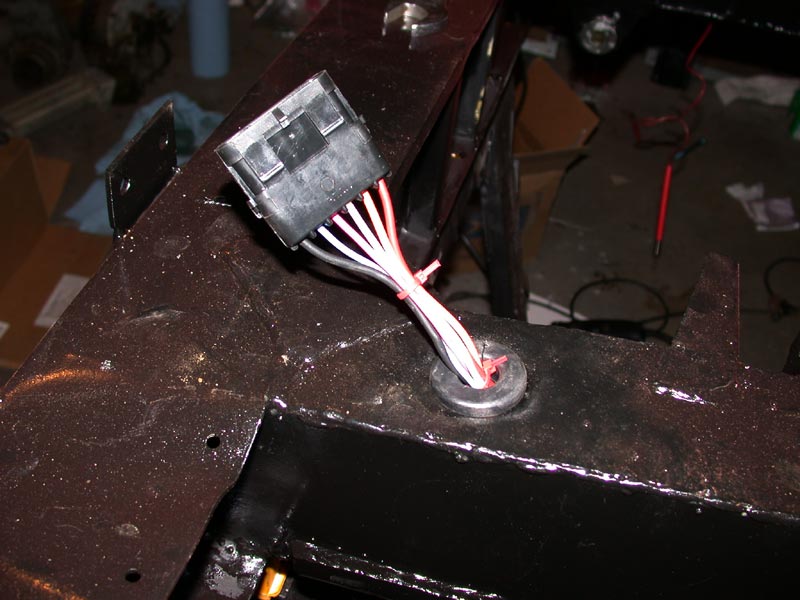 |
The connector for the rear wiring harness. That's a Weatherpak connector, nice and waterproof. |
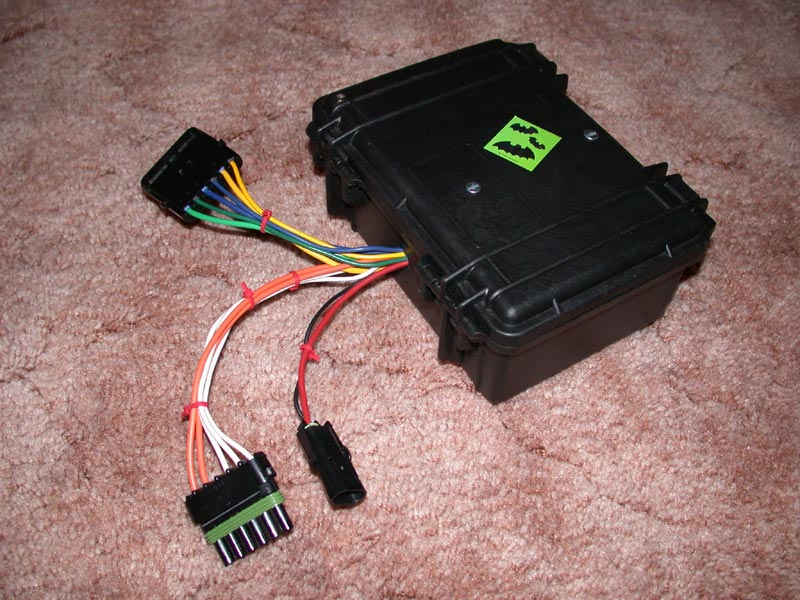 |
What is this? A box of electric bats? |
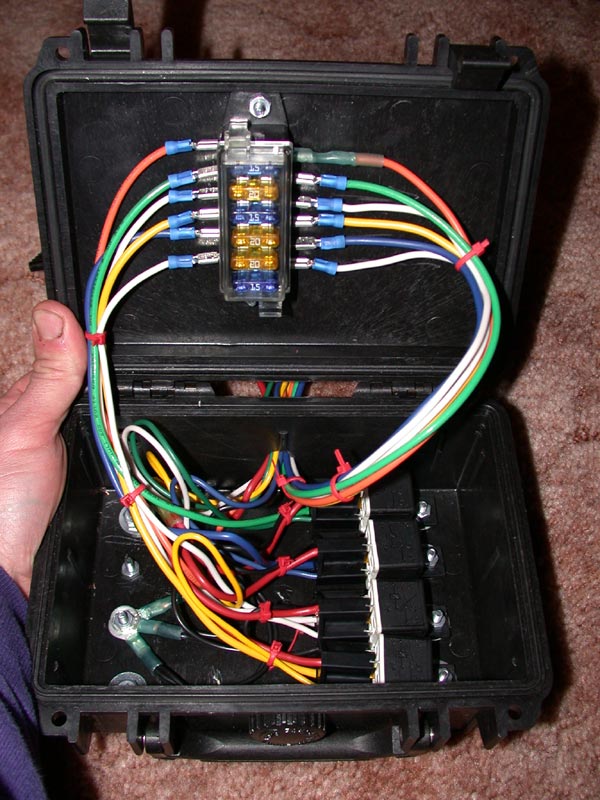 |
No! It's the new fusebox, installed in a Pelican camera case. This is so airtight it even includes a purge valve. It will be installed where the old air cleaner was found. Because of this, I used different connectors which saved me some space. All the connectors outside this box are either Weatherpak or heatshrunk, self-soldering ones. |
 |
Testing the new wiring. Yes, I did find a problem. |
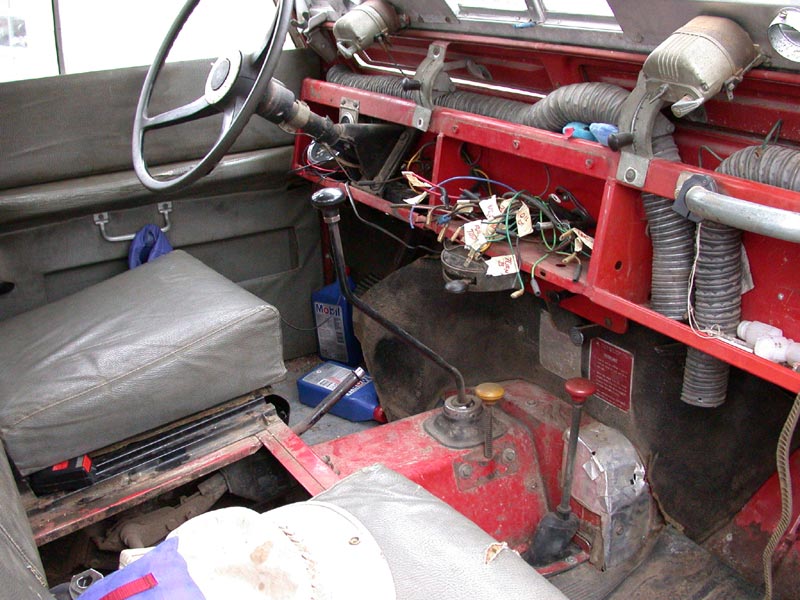 |
Of course, to do the testing I needed an instrument panel. Poor Basil! |
 |
The instruments in their new home. Other than three new toggle switches, all the parts are original Land Rover. |
 |
The "new" rebuilt steering box in place. One of the first meetings of the crusty and the shiny. |
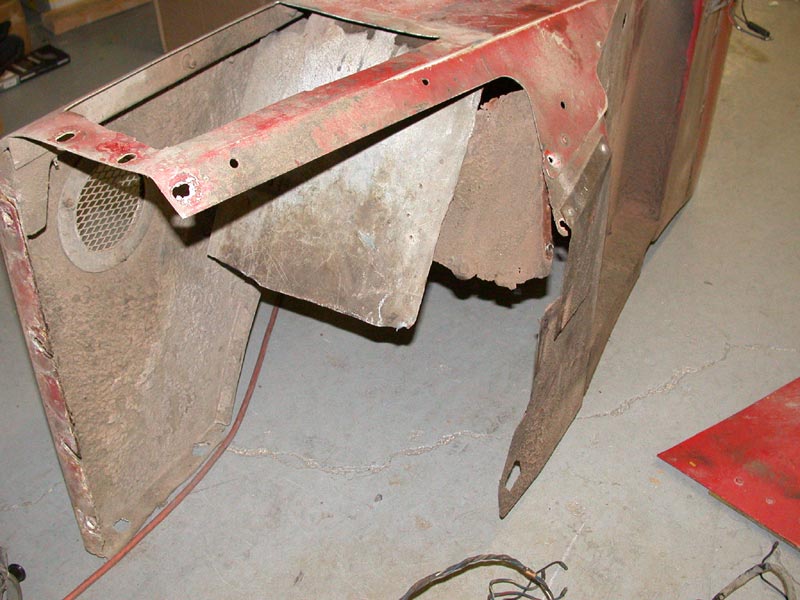 |
The custom mud shield that had to be amputated. |
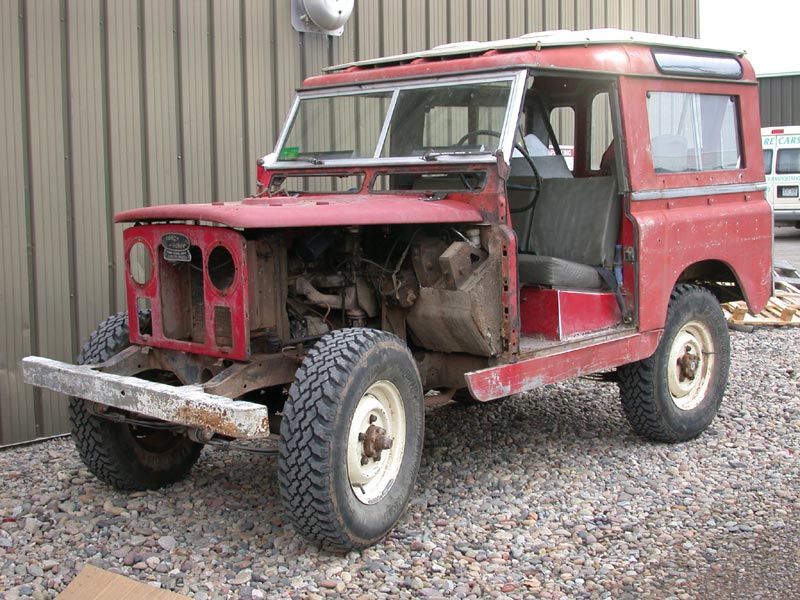 |
Poor sad Basil. Actually, there's not much missing. But he sure looks bad. |
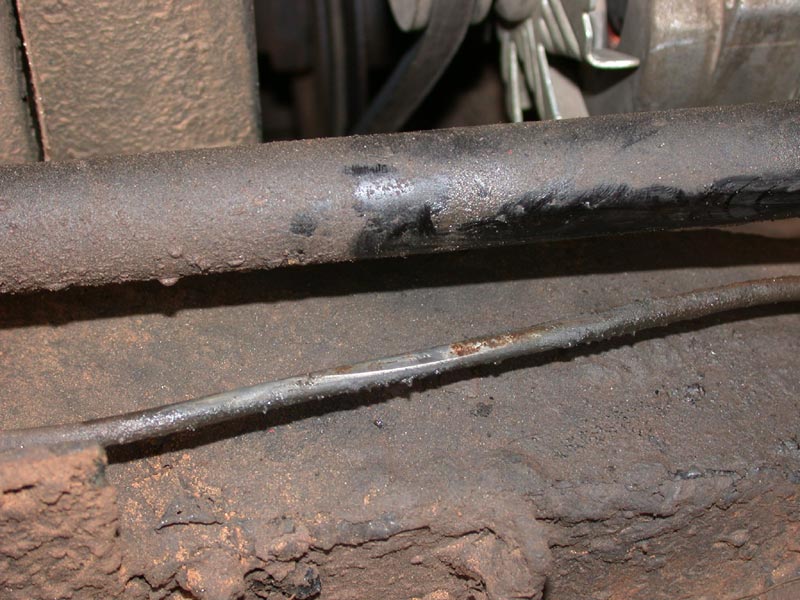 |
I'm very glad I caught this - the front left brake line had been rubbing on part of the steering. It has a pinhole leak. I didn't build this line! |
Back - Frameover, part 1 | Return to the top | Next - Frameover, part 3
Got a comment? Sign Basil's guestbook!
And now, back to Keith's Page de Home